Popular posts from this blog
How to configure Panasonic NS300 by initial easy setup wizard?
By
Online IT Services
-Dated-
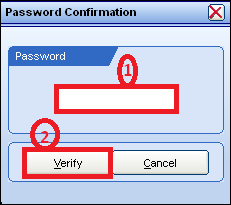
We can configure Panasonic NS300 when we setup new device. you can fallow the below steps- Login EPABX with help of Browser and IP Address (192.168.0.101) User- INSTALLER in Capital Letter Password- 1234 (By Default) Click on Install Enter your Password Click on Start Setup Wizard Set the Time Zone and Date/Time Click on Next Select the CO Access No (Dial "0") Select Numbering Plan Click on Next Set the Manager Extention Click on Next Select the CO Dialing Mode (DTMF) Click on Next Configure IP Address Click on Next Click on Finish
How to configure Externel and Internal call block in panasonic ns300 epabx?
By
Online IT Services
-Dated-
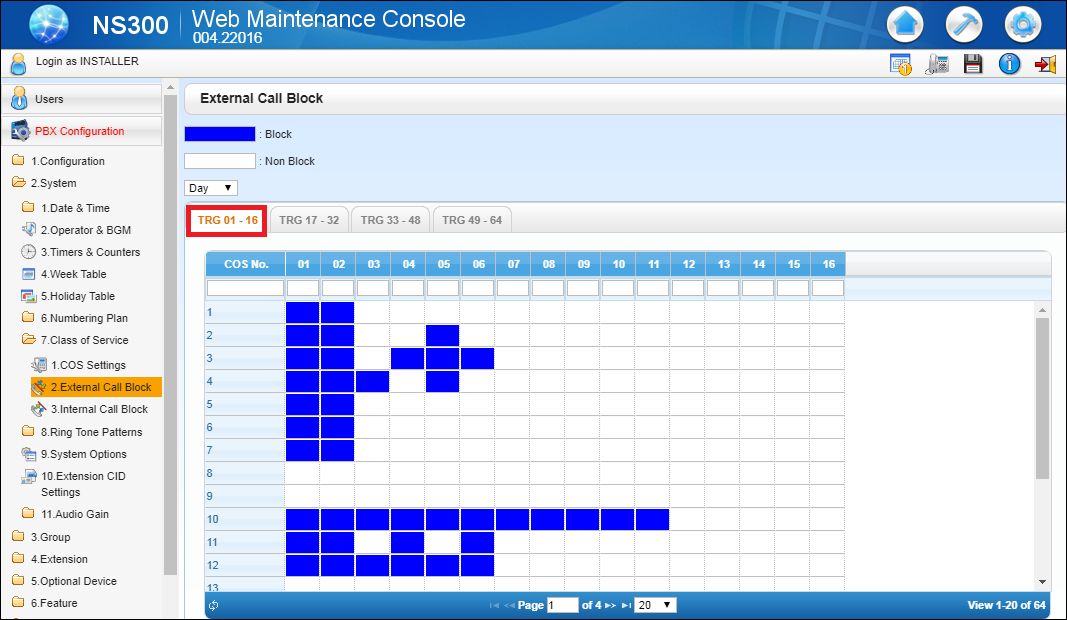
External Call Block- We can configure external call block settings in panasonic ns300 epabx. From doing this we can block outgoing calls from extentions of specific CO(Trunk) line. We restrict the CO Lines for preventing calling. Login your Web Maintenance Console Go to PBX configuration Expand System Expand Class of Service Select External Call Block Go to TRG 01-16 Draw the Blue Square for blocking CO Lines Internal Call Block- We can configure internal call block settings in panasonic ns300 epabx. From doing this we can block calling between two extention. Login your Web Maintenance Console Go to PBX configuration Expand System Expand Class of Service Select Internal Call Block Go to COS 01-16 Note- 1- COS1 and COS2 can make calls to COS1, COS2, COS3, COS4, COS5 & COS6 2- COS3 and COS4 can make calls to COS1, COS2, COS3 & COS4 only. ...
How to record and upload DISA or Greeting/Welcome message in panasonic ns300 epabx?
By
Online IT Services
-Dated-
You can record DISA/Welcome message easily by KTS phone. 1- For Recording Your Message Go on KTS Phone Press SP-Phone Enter *361501 Display Wait Message then start timing in Second Start speaking for recording your Greeting Message Press Store For Listen Playback ( Your Recorded Message) Press SP-Phone Enter *362501 2- Uploading ( Your Recorded Message) Login your Web Maintenance Console Click on Maintenance Go to Utility Expand File Select Message File Transfer PC to PBX Click on Choose File Click on OK
Just 6 Important Basic Steps for configurartion Panasonic KX-TES824
By
Online IT Services
-Dated-
You can configure Panasonic EPABX System KX-TES824 after fallow just few steps- Enter in programing mode then after you configure just 6 steps as given below- Steps-1 Enter the in programing mode Enter Code "000" Set the Date & Time according to Instructions Date & Time Setup[000] Steps-2 Enter the in programing mode Enter Code "009" Configure Extention Number as given below Plan in Note Extention Number Assigning[009] Note- Programeable number follow as below- Plan 1: 100-199 Plan 2: 100-499 Plan 3: 20-49 Steps-3 Enter the in programing mode Enter Code "121" Select "0" or "9" according you Automatic Line Access[121] Steps-4 Enter the in programing mode Enter Code "401" Select DTMF Dial Mode[401] Steps-5 Enter the in programing mode Enter Code "400" Select "Connect" for you CO Line Select "No Connect" for Blank CO Port ...
How to configure DISA message in panasonic ns300 epabx?
By
Online IT Services
-Dated-
DISA Message configuration in panasonic ns300- Step-1 Login your Web Maintenance Console Go to PBX Configuration Expand Optional Device Click on Voice Message Select DISA System Go to Intercept when all DISA ports are busy- Select to AA-9 Go to Intercept when No Dial after DISA answers- Select to AA-9 Step-2 Go to DISA Message Enter the ICD Group or Call Landing Extention Number opposit DISA(501/502) according selection of DISA Intercept in Step-2 Step-3 Go to again PBX Configuration Expand Group Click on Extention Hunting Group Type ICD Group Name Step-4 Go to again PBX Configuration Expand Group Click on Incomming Call Distribution Group Select Group Settings Click on Main Go to Distribution Method Set UCD opposit ICD Group Number Step-5 Go to again PBX Configuration Expand Group Click on Incomming Call Distribution Group Select Group Settings ...
How to configure Trunk Group for calling in panasonic ns300 epabx?
By
Online IT Services
-Dated-
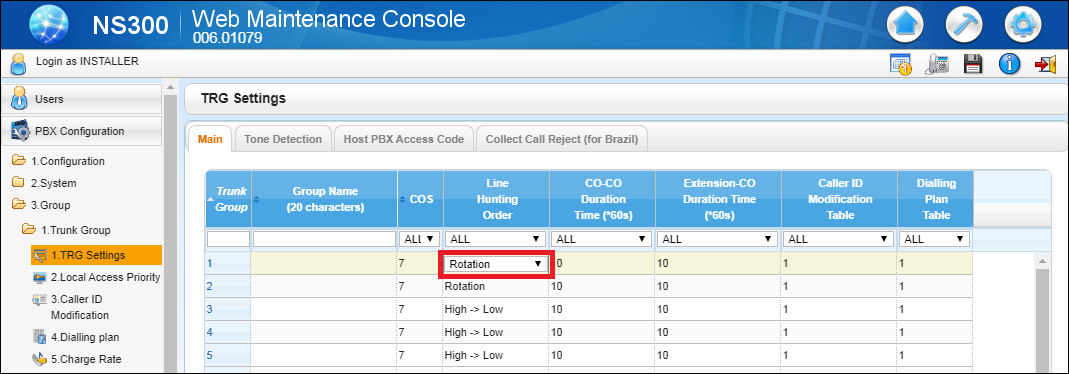
You can configure Trunk Group and manage you CO Lines according you. Step-1 Login your Web Maintenance Console Go to PBX configuration Expand Group Select TRG Settings Go to Main Select Rotation in Line Hunting Order Step-2 Login your Web Maintenance Console Go to PBX configuration Expand Group Select Local Access Priority Type the Trunk(CO) Name Step-3 Login your Web Maintenance Console Go to PBX configuration Expand CO & Incoming Call Select CO Line Settings Type the Trunk(CO) Name Set the Trunk Group Number Step-4 Login your Web Maintenance Console Go to PBX configuration Expand Group Select TRG Settings Go to Hot PBX Access Code Set the "0" for your CO Lines Note- You can use Step-4 when you using verification code for calling and not able to dial call after pressing "0"
How to enable Caller ID for CO Line in panasonic ns300 epabx?
By
Online IT Services
-Dated-
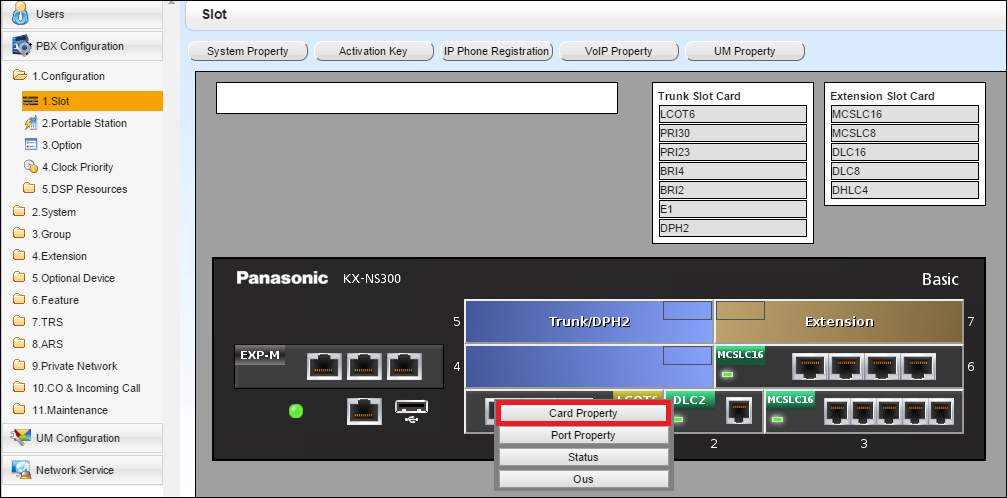
You can enable Caller ID for CO Lines... Login your Web Maintenance Console Go to PBX Configuration Expand Configuration Click on Slot Go to LCOT6 Click on Card Property Change Caller ID Signaling FSK into DTMF Change Caller ID (DTMF) Start Code-1 A into None Change Caller ID (DTMF) Start Code-2 D into None Go to again PBX Configuration Expand CO & Incoming Call Select DIL Table and Port Settings Enable CLI Ring for DIL Day/Night
How to configure Biometric(Biomax) N-BM160W for online software?
By
Online IT Services
-Dated-
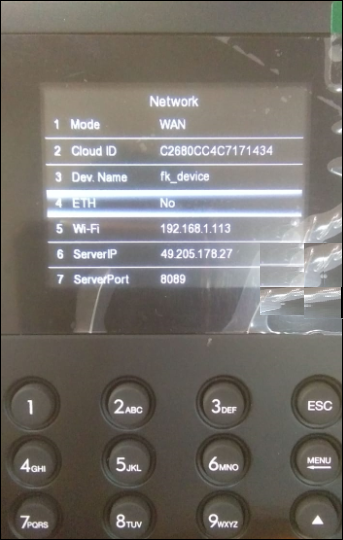
Biomax N-BM160W Configuration Step-1 Press Menu Button Select Settings Press OK Select Network Press OK Go to Mode(1) Press OK Select WAN Press OK Go to WiFi(5) Select Yes Press OK Go to Search(8) Select WiFi SSID Press OK Enter WiFi Password Press OK Go to Server IP(6) Enter Static IP Press OK Go to Server Port(7) Enter Port Number Press OK Press ESC Press OK (When prompt message Are You Sure Want to Save? ) Step-2 Login Your Smart Office Console(Hosted) Go to Device Management Click on Devices Click on Add New Device Then Enter Device Name and Short Name Enter Cloud ID in the place of Serial Number Enter IP Address Click on Save
How to download report from RealTime biometric?
By
Online IT Services
-Dated-
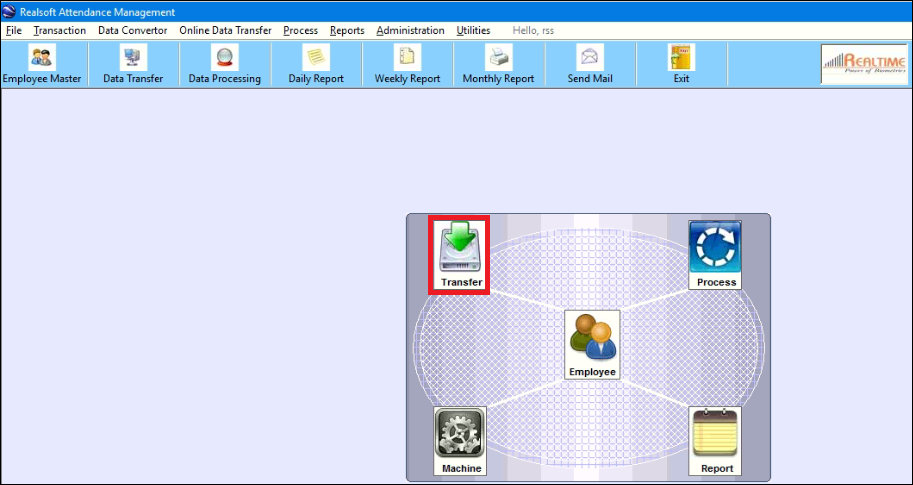
You can download Attendance Report from Desktop Application of RealTime biometric machine with the help of following steps. Step-1 Run your RealSoft Desktop Application Login with User & Password Click on Transfer Step-2 Click on Connect Then click on Download Data Step-3 Click on OK Step-4 Click on Transaction Menu Go on Generate Shift Click on For All Employee Step-5 Click on Show Shift Click on Generate Shift Click on OK Step-6 Click on Process Step-7 Select Periodic Select Date Range Click on Process Click on OK Step-8 Go to Report Menu Click on Monthly Report Step-9 Click on OK Step-10 Finally your attendance Report will be generated If you want other format then click on Export




Comments
Post a Comment
Please do not enter spam link.